Blocks: How to start

The most challenging part of the figure out to start with is the core body. This is Ribcage and pelvis connection plus the head. Once we have this sorted, upper and lower limbs are easier to add as we can recreate them quickly by adding a few cylinders or sausages. However, the main core provides a solid start where we can see almost the figure the clay will become soon.
An excellent way to start this is by doing boxes, even when this is not ideal because of the squarish look of it, but it helps a lot to figure out proportions and sizes. So let’s have a look at how we can do it.

From the boxes to the forms

Following the measurements we reviewed earlier in the cannon, we can shape a box for the ribcage and another for the pelvis. We do this by putting the clay over the armature we built already and placing it in the right spot. At fist, it will look very bulky and, to be honest, is far away from giving us the look of a human figure until we start shapping. So once we complete the two boxes, we are ready to cut those corners and extract something more organic.

We need to cut the excess material by looking at the box from 3 views: front, profile and top view. The ribcage is close to an “egg-shape” from a frontal view. Use the templates you see in the following illustrastions to help do this part.

We can start in the front view; let’s draw a line where we trace the contour of that shape, “egg shape”. Ensure we do not cut material from the limits where the shape touches the wall; the line should fill all the space until it touches the limit on the sides, top and bottom. Once we have the line, we have to cut the material to extract the shape and remove the excess material we do not need.

Now we move to the profile view, and we repeat the step. Then we look at it from the top or bottom and repeat the step again. In the end, we should have a very raw and angular form. All we need to do now is refine the shape to make it look closer to the shape of a ribcage.

In the folder of Scans and prints, we should have a file with a ribcage I made in the studio. It is a simplified version that we can go ahead and print in a 3D printer at home for reference. 3D printers are common nowadays, so if we do not have one, ask around; we might know someone who can help. It will help us to be more accurate. If we can not print it, we should still be able to view the file and look at it from any angle. This will also help for reference.  

When we finish shaping the boxes, the forms will be very soft. As we can see in the illustration, there is not much definition, but it is enough as a starting point. From here, it is essential we define some structures and planes. Javier will help you better understand what is essential and what is not, but remember that we do not need to shape the bone to do the figure as we are not trying to make an “‘Ecorche” ( anatomical study without skin). However, it is good for us to understand the anatomy and the shapes to get better results.

In the case of the Ribcage, we will concentrate on the front area and sides. The curvature of this block is vital to get a good feeling of the body shape. 

As we can see, the pelvis looks like a bucket flattened from the front and back. This bone is very tricky to understand its shape and functionality; this is why we simplify it to the minimum, which should help to grasp the idea. The front part, top and back are essential parts. If we do it right, it will help to get good results too.

Important note: Do not connect and blend the two blocks when we finish simplifying. Keep track at all times of the bone shapes.

THE KEY ANATOMICAL POINTS

As we explained before, the key points are essential to navigate through the work, not only because it helps to shape the block but because they give us an easy structure to figure out if what we are doing is right or wrong by getting back to this reference, this is why we should not lose track of them.

It is now when we should find these points in order to progress. It will help to shape the “V” shape of the ribcage, for instance, and establish the top of the ribcage from the front, which is 1/4 of a head lower, giving this way a tilt from the back, that is higher and the front that will be lower.

However, first, we need to get familiar with the blocks’ anatomy and look at the following Chapter Bone structure of the main blocks to learn more about it.

Subscribe to newsletter

Sign up to get news about upcoming events. No worries, we don´t send many emails, but you will be updated whenever a new workshop or video tutorial is available.

Head studies summary

PDF Title

RECOMMENDED BOOKS

The complete guide to Anatomy for artists & illustrators

Author: Gottfried Bammes

This book is essential for learning more about the human figure as it is very complete. Includes proportions based on eight heads ( be aware that we are using 7.5 heads), bone structure explanation, balance and range of movement of the joins. The anatomy applied to the figure is not necessarily as accurate as in the Paul Richer book. This book also includes pictures of models for an applied explanation.

Artistic Anatomy

Author: Paul Richer

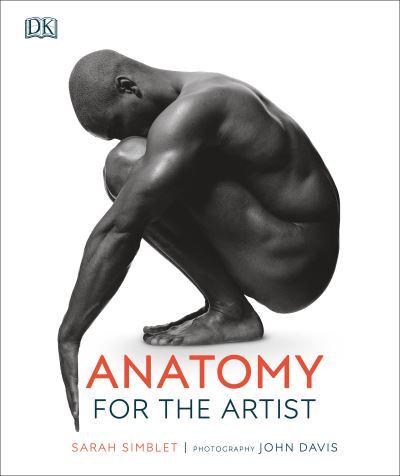
This book is excellent for learning anatomy from a medical perspective applied to art. Here we also find his 7.5 cannon explained. The illustrations are accurate, giving the precise location of muscles, layers and mapping of the human body. This book is used in official academies like the Florence academy.

MORFO: Anatomy for artists

Author: Michel Lauricella

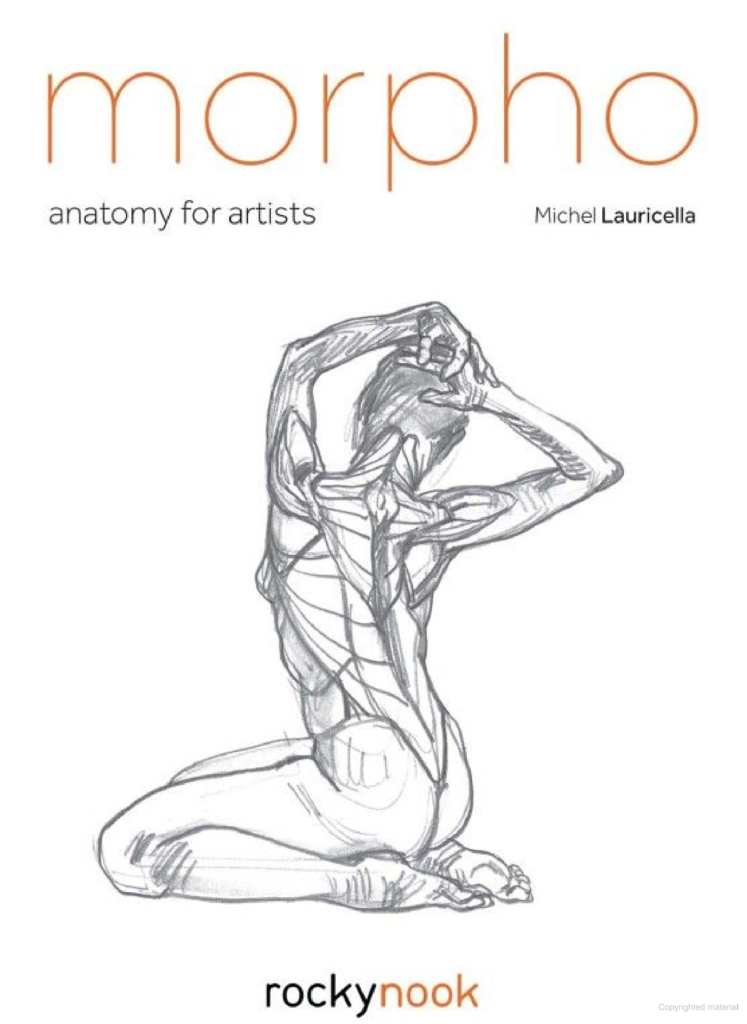
In this book, Michel Lauricella presents both his artistic and systematic methods for drawing the human body–with drawing techniques from the écorché (showing the musculature underneath the skin) to sketches of models in action. In more than 1,000 illustrations, the human body is shown from a new perspective–from bone structure to musculature, from anatomical detail to the body in motion.

MORFO: Simplified forms

Author: Michel Lauricella

This small, portable book presents a unique perspective on the human body for artists to study and implement in their drawing work. In this book, artist and teacher Michel Lauricella simplifies the human body into basic shapes and forms, offering profound insight for artists of all kinds, sparking the imagination and improving one’s observational abilities. Rather than going the traditional route of memorizing a repertoire of poses, Lauricella instead stresses learning this small collection of forms, which can then be combined and shaped into the more complex and varied forms and postures we see in the living body.

MORFO: Skeleton and bone reference points

Author: Michel Lauricella

This book provides a simplified and practical vision of the human skeleton to help all artists in their drawing studies. Here you will find the most common and useful approaches to the body’s underlying skeleton and bone structure, which will fuel your imagination and enrich your observational skills as you draw the living form. In this small, portable guide, artist and teacher Michel Lauricella focuses on the essentials you need to know.

MORFO: Anatomy for the artist

Author: Sarah Simblet

This book is excellent for the quality of the drawings; very expressive, fresh and accurate. This book is recommended as a reference for the quality of work we can achieve in the art standards mostly applied to drawing. It is also a good source of images of bodies and living anatomy.